- We recommend
that you engrave a sample of the logo when you receive it.
- Always turn
off the Wizzard engraver before plugging in or pulling out a cartridge.
- Turn off the
engraver and remove the cartridge from the machine.
- Pull up the
lever at the end of the socket to release any existing chip. Remove
the chip from the socket.
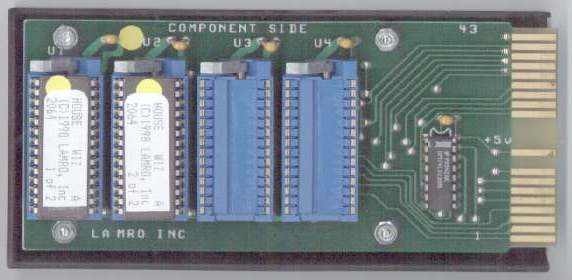
- Place the chip
in a socket starting with the one on the left or outside end; e.g.
U1 first, U2 next, followed by U3, then by U4. Do not leave any
socket unfilled to the left or outside of the cartridge.
- Place the chip
in the socket with the yellow dot towards the colored component
at the top of the cartridge. Failure to do this will cause permanent
damage to the logo chip!!
- If the chip
has a blue dot at the bottom of the chip, it is a terminating chip
and must be moved tn the right as you place new chips on the cartridge.
The computer will not read any chips placed to the right of the
blue dot.
- Some logos
require two chips. Both chips must be used to make the logo work.
To use two-chip logos, place the #1 chip to the outside socket followed
by the #2 chip.
- With the engraver
off, place the cartridge in the front slot of the Wizzard, on the
left side under the keyboard. When used with a Dahlgren cartridge,
place the Dahlgren cartridge in the front slot, then place the Lamro
cartridge in the back slot.
- Turn the Wizzard
on. Disregard any font error message that may appear on the screen.
- If the Wizzard
locks up, do not remove any cartridges until you have turned off
the Wizzard. Failure to do so may cause damage to the cartridge
and chips!! When the Wizzard locks up, it may be a chip put in backwards
or a bad logo chip, or lack of a blue dot chip on the cartridge
(this chip must be used on XL Wizzard machines).
- With the engraver
on, go to the job set up program.
- Select the
logo you want by pressing the space bar the same way you select
a font of type.
- To engrave
the logo, use the capital letter ”A”
TOP, Yellow dot / notch up

1 . . 2 . . 3 . . 4 . .Chip order
|